
Stylize your photos in milliseconds with neural network
In this article, I will show you how to stylize your photos with fast neural style transfer. Neural style transfer is a great way to turn your normal snapshots into artwork pieces in seconds. Thanks to our friends at the TensorFlow, they have created and trained modules for us so that we can apply the neural network quickly. After reading this hands-on tutorial, you will have some practice on using a TensorFlow module in a project. If you are ready, let’s get started!
Table of Contents:
- Introduction
- Step 1 – Libraries
- Step 2 — Functions
- Step 3 — Content and Style Images
- Step 4 — TensorFlow Hub Module
- Final Step —Exporting the Result
Introduction
Let’s start by understanding TensorFlow and Neural style transfer in their words. Then we will move into application part.
TensorFlow
“TensorFlow is an end-to-end open source platform for machine learning. It has a comprehensive, flexible ecosystem of tools, libraries, and community resources that lets researchers push the state-of-the-art in ML and developers easily build and deploy ML-powered applications.”
https://www.tensorflow.org
Neural Style Transfer
“Neural style transfer is an optimization technique used to take two images — a content image and a style reference image (such as an artwork by a famous painter) — and blend them together so the output image looks like the content image, but “painted” in the style of the style reference image.”
https://www.tensorflow.org/tutorials/generative/style_transfer
Step 1 — Libraries
First things first, we have to install a couple of libraries for this project. And these libraries can be listed as following: Matplotlib, Numpy, TensorFlow, and TensorFlow Hub.
Matplotlib is for visualizing the images in our Jupyter notebook. It also allows us to save the plots if we want to keep a record of the process.
Numpy is a scientific library that needs to be installed. It is one of the top libraries that work in the backend. Since images are made of pixels and are collected as multi-dimensional arrays, the Numpy library helps us work on this kind of array.
TensorFlow is a machine learning ecosystem developed by Google developers and software engineers. Many giant companies are using TensorFlow for their businesses.
TensorFlow Hub is a repository of trained machine learning models ready for fine-tuning and deployable anywhere. It is a part of the TensorFlow umbrella.
We can install all these packages and libraries in one line using pip, a python package manager. Run the following line in your terminal window:
pip install matplotlib numpy TensorFlow tensorflow_hub
After the installation process is concluded, we can move ahead and create a new Jupyter notebook. And then import them into the program.

Step 2 — Functions
In this step, we are going to define three functions. I will add short descriptions of what each function does under them.
Load Image
In this function, we are decoding the image into three different channels. This is like going into pixel level of things. And then we are cropping the center of the images. Lastly, we are resizing the image so that our content and style images are matching in terms of size.
def load_image(image_path, image_size=(256, 256), preserve_aspect_ratio=True):
    img = tf.io.decode_image(
      tf.io.read_file(image_path),
      channels=3, dtype=tf.float32)[tf.newaxis, ...]
    img = crop_center(img)
    img = tf.image.resize(img, image_size, preserve_aspect_ratio=True)
    return img
Crop Center
In this function, we are just cropping the center of the photos. Little math stuff going on here.
def crop_center(image):
    shape = image.shape
    new_shape = min(shape[1], shape[2])
    offset_y = max(shape[1] - shape[2], 0) // 2
    offset_x = max(shape[2] - shape[1], 0) // 2
    cropped_image = tf.image.crop_to_bounding_box(image, offset_y, offset_x, new_shape, new_shape)
    return cropped_image
Visualize Images
In this function, as you can understand from it’s name, we are visualizing the plots in grid order.
def visualize(images, titles=('',)):
    n = len(images)
    image_sizes = [image.shape[1] for image in images]
    w = (image_sizes[0] * 6) // 320
    plt.figure(figsize=(w  * n, w))
    gs = gridspec.GridSpec(1, n, width_ratios=image_sizes)
    for i in range(n):
        plt.subplot(gs[i])
        plt.imshow(images[i][0], aspect='equal')
        plt.axis('off')
        plt.title(titles[i] if len(titles) > i else '')
        plt.savefig("final.jpg")
    plt.show()
Step 3 — Content and Style Images
This will be an easy step. We are going to pick two images, and then import them into our program. We will use the load_image function that we defined earlier to import the images.
Here are the raw versions of the images that I chose:
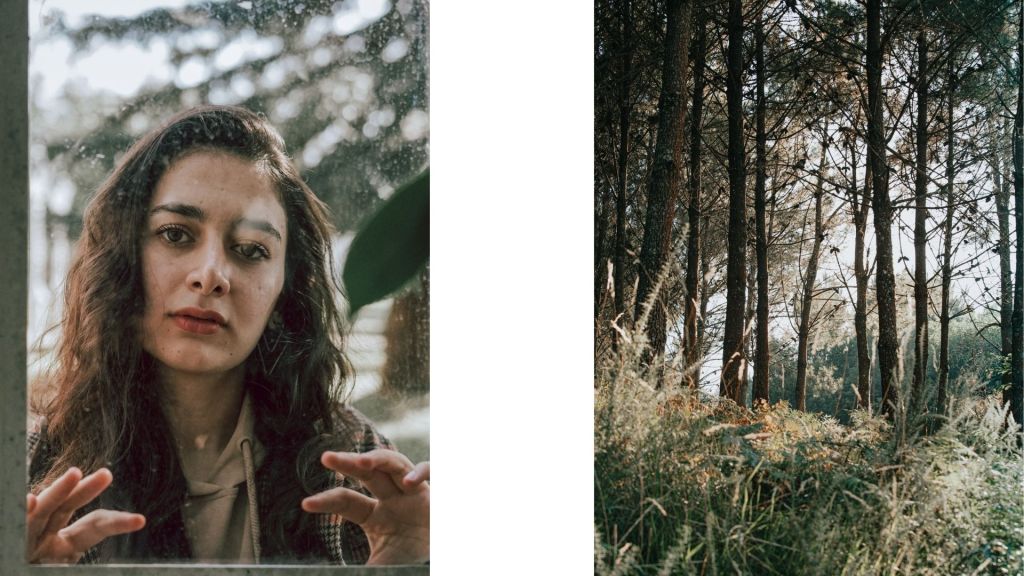
Content image is the main image the we will stylize. And the style image is the one that we will use as a reference when transferring the style. I chose a forest image because it was fitting well with my content. Feel free to use a famous painting of an artist as your style image.
content_image = "content.jpg"
style_image = "style.jpg"
output_img_size = 512
content_img_size = (output_img_size, output_img_size)
style_img_size = (256, 256)
content_image = load_image(content_image, content_img_size)
style_image = load_image(style_image, style_img_size)
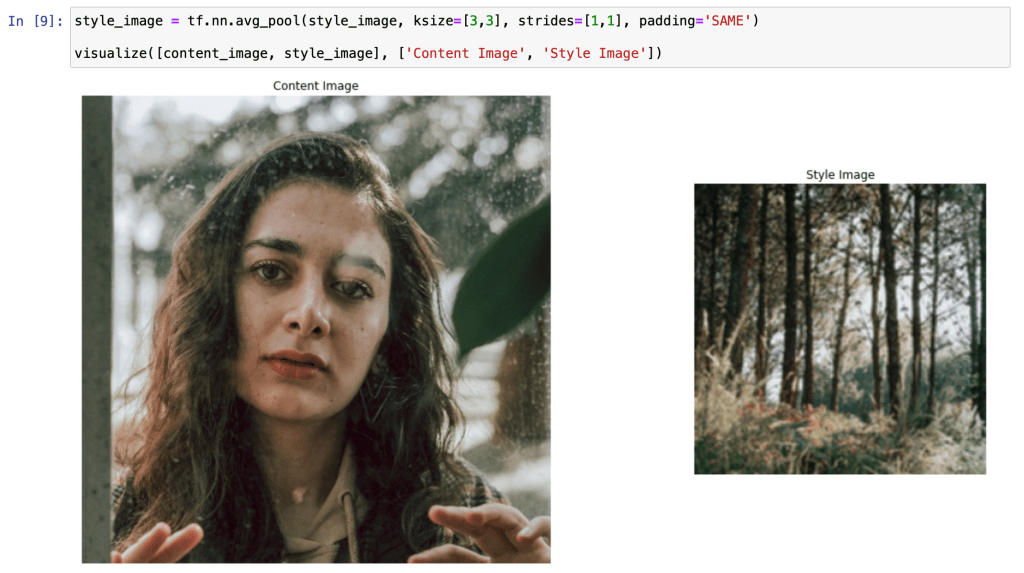
We have loaded the images into the program. Now, let’s train our neural network model with our style image. We will use avg_pool method.
style_image = tf.nn.avg_pool(style_image, ksize=[3,3], strides=[1,1], padding='SAME')
visualize([content_image, style_image], ['Content Image', 'Style Image'])
Step 4 – TensorFlow Hub Module
We will define and then load the TensorFlow hub module that we want to use in this step. The module that we will use is called Arbitrary Image Stylization.
hub_handle = 'https://tfhub.dev/google/magenta/arbitrary-image-stylization-v1-256/2'
hub_module = hub.load(hub_handle)
Now, let’s run the model using our content and style images.
results = hub_module(tf.constant(content_image), tf.constant(style_image))
stylized_image = results[0]
Final Step – Exporting the Result
We are almost done!
We are almost done! In this final step, we are going to visualize the final result to see the before and after of our snapshot. We will call the visualize function that we defined in the functions step.
visualize([content_image, style_image, stylized_image], titles=['Original Image', 'Style Image', 'Stylized Image'])
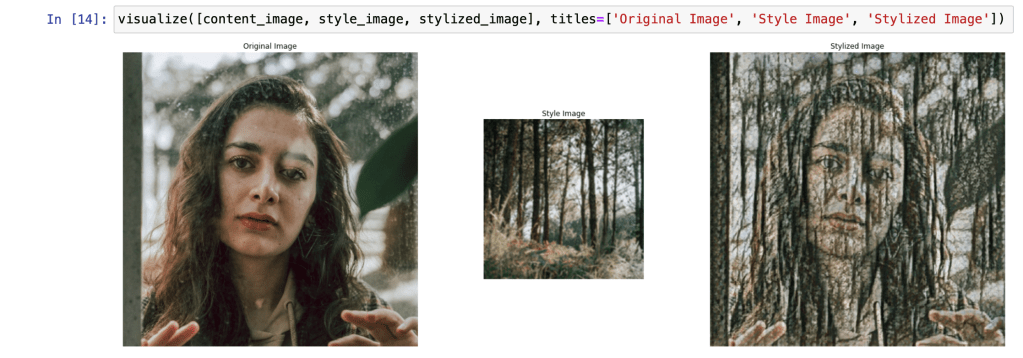
Let me know you thoughts. I think this is really cool. I tried to choose similar color tones so that the final artwork looks excellent. As you can see, the person in the shot blends so well with the forest. I think the neural style transfer has given the image more deepness and emotion.
To share this artwork with my friends, I will go ahead the export it. Here is the function to export an image edited in TensorFlow.
def export_image(tensor):
    tensor = tensor*255
    tensor = np.array(tensor, dtype=np.uint8)
    if np.ndim(tensor)>3:
        assert tensor.shape[0] == 1
        tensor = tensor[0]
    return PIL.Image.fromarray(tensor)
Now, let’s call the export_image function. I will save it as “stylized-image.png”.
file_name = 'my-stylized-image.png'
export_image(stylized_image).save(file_name)

Conclusion
Congrats! We have created a unique artwork using TensorFlow with neural network. Programming is not just about solving problems. We can also use it for fascinating and artistic projects like this one. These kinds of projects helps me a lot to practice new skills. TensorFlow is one of the best when it comes to building machine learning / deep learning projects.
Hoping that you enjoyed reading this article and learned something new today. Working on hands-on programming projects is the best way to sharpen your coding skills. Feel free to reach me if you have any questions while implementing the code.
Let’s connect. Check my Medium blog and Youtube to stay inspired. Thank you,
